

How To Set Up A Sump Pump Aquarium
The popularity of the live coral "reef tank" aquarium has exploded in over the by decade. Advances in aquarium keeping technology have made this notoriously difficult division of the aquarium-keeping hobby affordable and accessible to an increasingly big number of people. As the diverse devices and components go more affordable, they've also been resized to fit on some of the smaller and nano sized aquariums nowadays in many people's homes.
Every bit a maintenance professional person, i of the common issues that I have to address is under-filtered aquariums. I often see pocket-sized aquariums with a live coral setup, with a filtration system that lacks a protein skimmer. Considering this is not an ideal situation, my recommendation is always to add a skimmer to the brandish. While hang-on-the-back skimmer options are available, my preference is to add an "overflow box" and "sump" to the aquarium. The sump is a tank located underneath the chief brandish aquarium, the overflow box is the device that safely (without floods) delivers the h2o to the sump tank beneath. In most instances, adding sump to existing tank is equally piece of cake as a few unproblematic steps.
This setup allows i to add a larger and more effective poly peptide skimmer than a hang-on-the-back skimmer will offer and increase the total volume of the aquarium at the aforementioned time.Both of which are huge benefits to the long-term success of a reef tank. A below the tank sump volition also provide space for adding boosted filtration devices further down the road.
This commodity discusses the bones steps necessary to add an overflow box and a sump to an existing aquarium. I'll get over what equipment you'll need too as some links to my favorite prominent online retailers where you can find whatever you'll demand for your projection. The purpose of this article is to help you make up one's mind what equipment you will need and allow you to develop a rough budget for your project.

The showtime thing that you'll demand is what's called an overflow box (pictured above). The overflow box creates an unbreakable siphon delivering water to your sump from the aquarium above.
The epitome on the right of the effigy is an overview of a reef ready aquarium. The junction A is a special plumbing fixtures called a bulkhead that allows you to plumb through a hole in the lesser of the aquarium. The water is returned to the aquarium through the blue line at C. This bluish line is called your 'return'. and the h2o 'over-flows' through the teeth in the overflow box.
The image abovbe of the effigy is of an add together-on overflow box, merely like you volition need to add a sump to an existing aquarium. Here, pipe at the bottom of the overflow box delivers water down to a sump below the aquarium. The water returns to the system through the blue return line at C, and it overflows into the overflow box just as outlined above.
The overflow box is a slap-up economical manner to add a sump to an existing aquarium and increase the book of your organisation dramatically.
The adjacent thing you need is a sump to take hold of all of the water that the overflow is delivering.
You could literally employ any container that will safely hold water. If your display tank is small enough (~40 gallons or less) a standard 10 gallon tank should piece of work for you only fine.
For reef tanks, most people become "Berlin method" and use a bare sump. Others choose to use the sump to agree live rock, leaving more negative infinite in the display tank. Regardless, adding a sump will increment the volume of the system and provide you a place to put additional filtration.

The pump yous select will depend on your system volume, the number of coincident devices you programme to operate, your plumbing skill, and ultimately your budget.
You'll demand a pump to feed h2o through your protein skimmer, and a pump to render water from the sump to the principal display tank. A single pump can certainly accomplish this task, with the help of a few plumbing fittings.
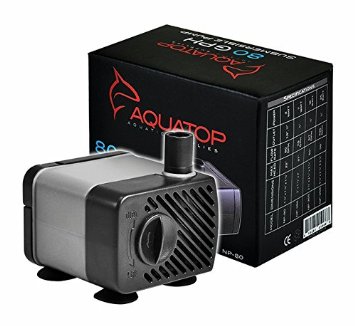
Depending on the blazon of sump you have and your skills as a plumber, ii options exist for your render pump. A submersible pump like the 1 shown above is the easiest selection. These types of pumps generally come up boxed with fittings for some common sizes vinyl tubing (tubing is available at your dwelling center).
The second pump option is the external pump. External pumps are most suitable to large and/or more than complex aquariums. The master reward of the external pump is that they dissipate rut produced by the pump into the air instead of into your reef tank. This is a cardinal advantage for those who struggle with high aquarium temperatures.
Very generically, you volition demand a pump that has a flow-rate of at near twice the volume of your system in GPH (gallons per hour). Without taking into account any specifics of your system, this will requite yous between 1.v-ii plow-overs per hour. Where all the water in the system flows through the organisation upwardly to two times per hour. (In reality it will be much less than this, just for sake of simplicity, I digress.)
You can opt for a hard-plumbed system with PVC pipes and fittings if you have the skill needed for installation. Otherwise flexible silicone tubing is suitable to make the necessary connections.
Stay diligent equally you give your system a test-run. Examine fittings for leaks. Pocket-size leaks tin turn into salt creep or even cause damage to the flooring under the tank.
Fill the sump with mixed seawater and outset the pump. Water should flow through your return assembly into the tank at a brisk simply not overwhelming period-rate. Adjust as the flow as necessary.
If this is a new organisation yous may desire to consider giving your system a exam-run with only freshwater, waiting to add your common salt mix or mixed saltwater after ensuring your plumbing connections are gratuitous of leaks.
If the aquarium looks every bit if information technology volition begin to over flow, unplug your pump. Close the brawl valve yous installed slightly, and switch the pump on once more. Expect for the arrangement to "equalize"…you should notice the water level drop in your sump as the display aquarium is filled to the top. Superlative the system off with new water to maintain an appropriate "minimum-level" in your sump, or a few inches to a higher place your pump intake.
Its always a skillful idea to observe the system regularly for the offset few hours to ensure the water levels stay equalized.
Adding sump to existing tank is only that unproblematic.
A Protein Skimmer will facilitate "cream fractionation" a process that will not just give you splendid gas-exchange, simply volition too remove some waste matter products from your organisation entirely.
At that place are lots of options out there. At a minimum, you tin look for a "in-sump recirculating skimmer" as your best option here. New "cone shaped" varieties (as pictured) offer a high capacity in minimal space.
A skilful skimmer is the centerpiece of your filtration system, information technology is important not to skimp in this surface area. Don't be afraid to purchase a skimmer that has a capacity that is greater than that of your aquarium. Every bit long equally your sump can comfortably house the skimmer, you will non regret upsizing your skimmer.

Pro Tip: Select your sump and skimmer advisedly to ensure that they are compatible units. If your skimmer requires internal functioning, make sure there is a sump compartment that is big plenty to conform the skimmer. If the skimmer requires a constant h2o level, ensure that you lot accept baffled sump that tin can accommodate it.
A media reactor installed on your system volition let y'all utilize various types of media including, granular ferric oxide (GFO), bio-pellets, or even combination media's such every bit Chemi-Pure.
Another recommendation I brand to all of my customers is to add a media reactor to your system, though keep in mind in that location are different types of reactors and not all media are suitable for every reactor type.
In a generic sense, a reactor is just a vessel to hold media. Perhaps the central characteristic is that the water is delivered to the bottom of the media and it flows upward through information technology. This reduces the compaction and water channeling through the media.
This will dramatically reduce food levels in your system. I generally recommend granular ferric oxide (GFO) media that removes phosphates from your system. A new production, bio-pellets are a great way to reduce both nitrates and phosphates. Though the effect may not be every bit dramatic as with a GFO reactor.
With a sump, adding a reactor is very easy. Just add your media reactor filled with GFO media to your sump sleeping accommodation.
Y'all tin feed the reactor with your main return pump if it is big plenty to share capacity. Otherwise, a small dedicated submersible pump to feed the reactor is simpler way to go. Only connect the pump to the tubing provided with the media reactor and submerge it in your sump. The effluent water (the tubing coming out of the reactor) can be simply directed back into the sump.
The reactor and skimmer may bladder a bit before they're filled with h2o. But in one case full, the weight of the h2o should hold them in identify.
And that's information technology. Well, at least that's the bones version.

Source: https://fishgeeks.com/adding-sump-overflow-existing-reef-aquarium/
0 Response to "How To Set Up A Sump Pump Aquarium"
Post a Comment